Newsletter Subscribe
Enter your email address below and subscribe to our newsletter

Enter your email address below and subscribe to our newsletter


This method works well when learning how to upload pictures from iPhone to computer remotely.
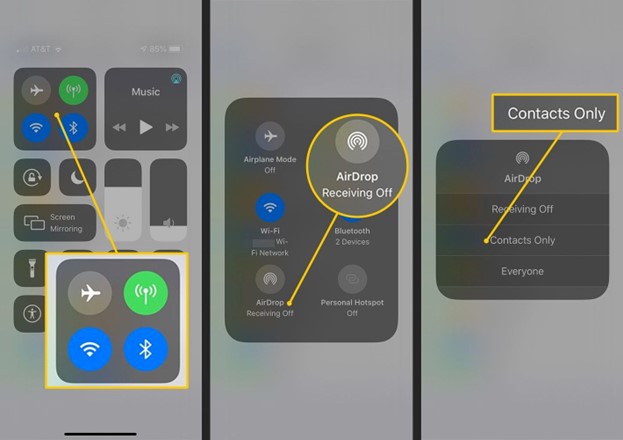
Method 2: Using AirDrop
AirDrop is popular for Apple-to-Apple transfers and is often used when people ask how to get your video from iPhone to laptop.
Steps
If you’re searching for the most reliable way to transfer photos from iPhone to PC, you’re not alone. In 2026, iPhones capture high-resolution photos, Live Photos, and large videos that quickly consume storage space. Moving these files to a computer is essential for backups, editing, and long-term organization. Knowing how to send photos from iPhone to computer properly can save time, prevent data loss, and keep your files intact.
Many users now prefer smarter solutions like iCareFone because it offers a faster, more flexible way to manage iPhone data without relying on iTunes.
In this guide, you’ll learn 6 wired and wireless methods, important things to consider before transferring, and answers to common questions so you can confidently transfer photos from iPhone to PC in 2026.
Part 1: Things You Should Know Before a Smooth Transfer
Before starting the transfer process, understanding a few key points will help you avoid errors and frustration.
Being aware of these points makes it easier to upload pictures from iPhone to computer smoothly.
Part 2: Transfer Photos From iPhone To PC With A USB Cable
Method 1: Use the Most Efficient Software (iCareFone)
Tenorshare iCareFone is one of the most efficient tools to send photos from iPhone to PC without iTunes or complicated steps.
Main Features & Advantages
Step-by-Step Instructions
Step 1: Connect Your Device Using USB
Download and install Tenorshare iCareFone on your PC or Mac. Open the program. Connect your iPhone to the computer using a USB cable. Now unlock your iPhone and enter the passcode.
When the device is detected, click “Manage” from the left menu.
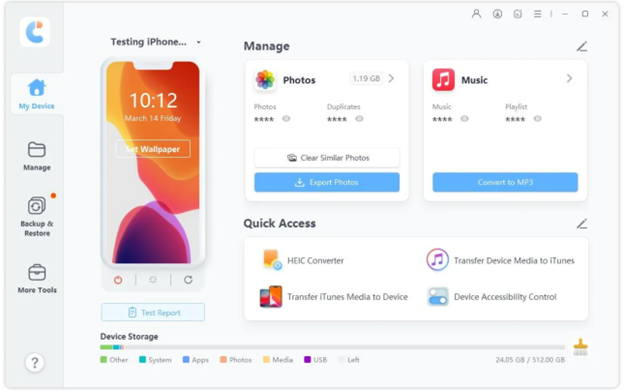
Step 2: Manage Device Data
After connecting, choose the type of data you want to manage.
iCareFone lets you manage different kinds of files on your iPhone.
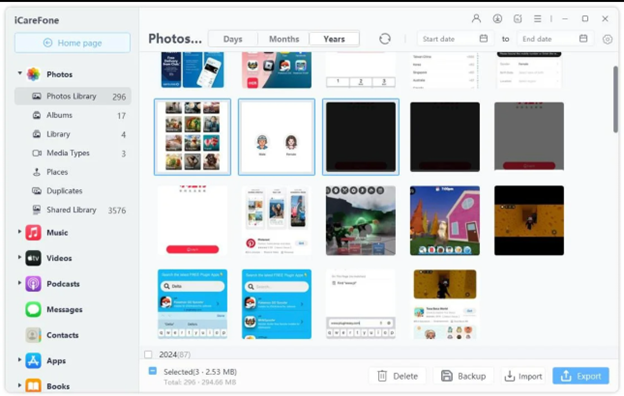
Photos & Videos Options
Import or Export Photos and Videos
Step 1: Select Photos
Now choose the photos you want to export and click the “Export” button at the bottom.
Hold the Ctrl key to select more than one photo.
Step 2: Choose Format and Save Location
Choose the file format (JPG or PDF) and then select where you want to save the photos in PC.
After that, click “Next”.

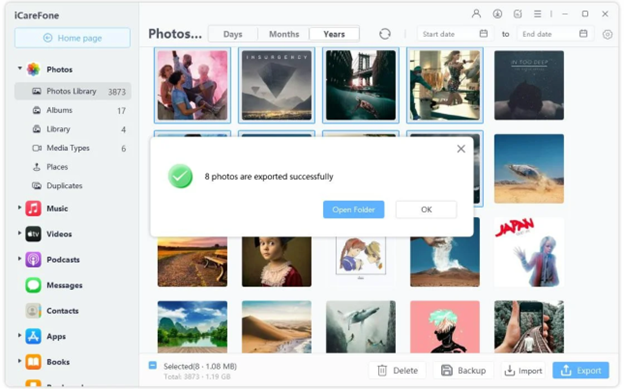
Step 3: Export Photos
The photos will start exporting to your computer. A message will show when the process is finished.
Step 4: Import Photos (Optional)
To add photos from your computer to your iPhone, click “Import”. Select the photos you want to upload.
This method is ideal if you frequently transfer photos from iPhone to PC or manage large photo libraries.
Method 2: Use the Windows Photos App
Windows Photos is a built-in option for basic photo transfers.
Steps

This is a common solution for users searching for how to send photos from iPhone to pc without installing extra software.
Method 3: Use Windows File Explorer
File Explorer gives direct access to your iPhone’s storage.
Steps
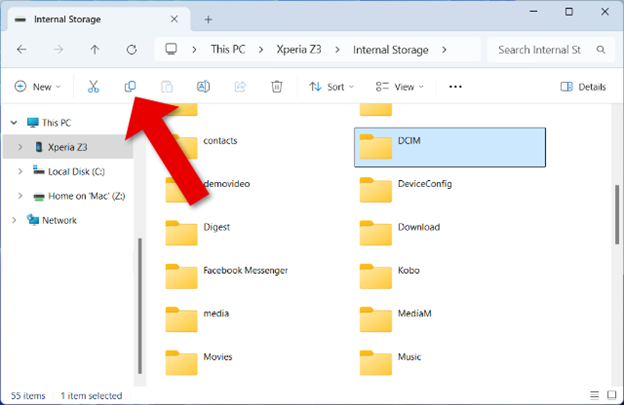
While simple, this method can be slower and less organized.
Part 3: Transfer Photos From iPhone To Computer Wirelessly
Method 1: Using the iCloud
iCloud lets you transfer photos wirelessly across devices.
Steps
Method 3: Using Google Drive
Google Drive is a cross-platform option familiar to Android users.
Steps
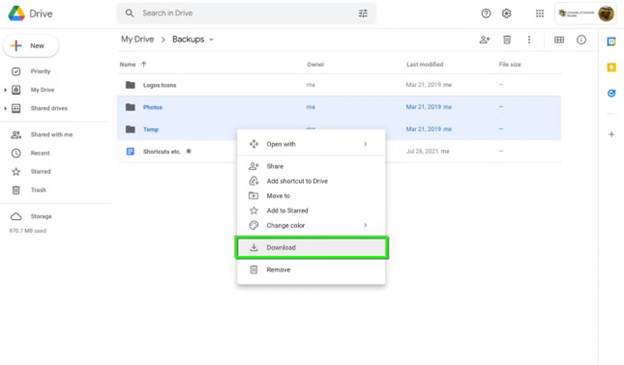
This approach is similar to how to transfer pictures to computer from android, making it easy for users switching platforms.
Part 4: FAQs About Transfer Photos From iPhone To PC
Will this process remove all the photos I select from my iPhone?
No. Most transfer methods only copy your selected photos to the computer. The original photos remain safely stored on your iPhone unless you delete them manually.
Will the Live Photo still work properly after the transfer?
Yes. Live Photos usually keep their motion effect after transfer, especially when you use professional tools like iCareFone that support this format correctly.
How do I transfer albums?
To transfer full albums, it’s best to use third-party tools that support album structure. Built-in methods usually transfer photos one by one without folders.
Conclusion
Learning how to transfer photos from iPhone to PC is essential for managing storage, protecting memories, and keeping your files organized. While Windows and cloud options work for basic needs, they often come with limitations such as slow speed, missing files, or format issues.
For a faster, safer, and more flexible solution, we strongly recommend Tenorshare iCareFone. It preserves quality, supports large files, and makes it effortless to transfer photos from iPhone to PC in 2026.